Tuesday, December 23, 2014

"Fairy Garden Teapot - A Moment In Time"

Merry Christmas to all my friends!! Its a busy busy season for me and my family. Presents to buy and wrap, rehearsals to go to for our church's performance and tons of projects to do. But all are joyful and blessed tasks.

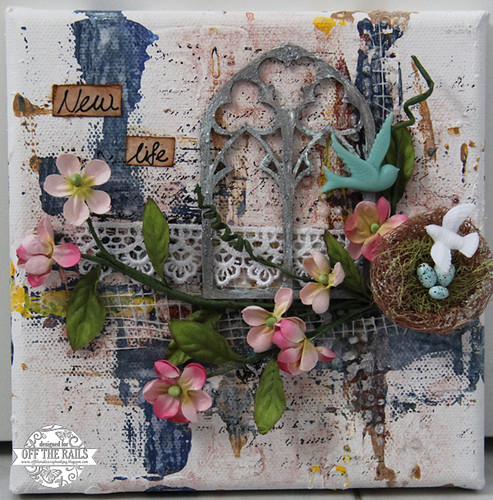
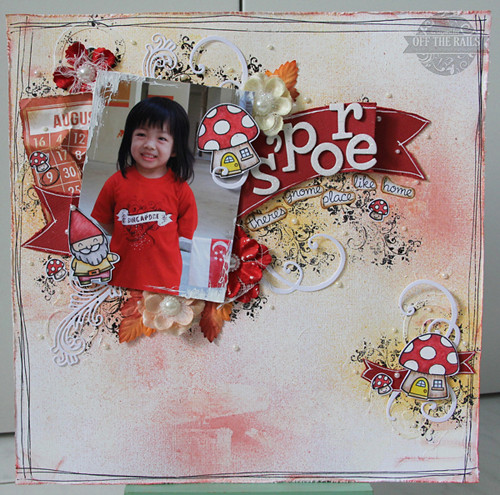
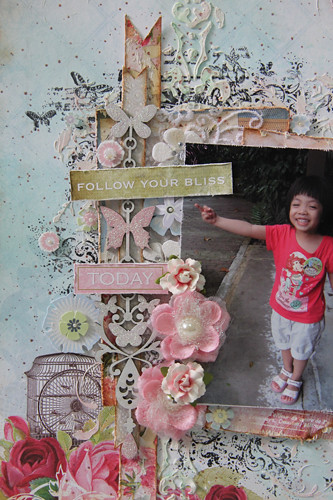
Today I want to share a project that's been on my to-do list for the longest time: a fairy garden. It started out with the gifting of the rusted "luggage box" from my dear friend. Thanks, Elaine! Have you ever had a moment in time when you wish you are living in a different world? Well, I have. In the world of little fairies. And this is how the title, "A Moment In Time" came about.

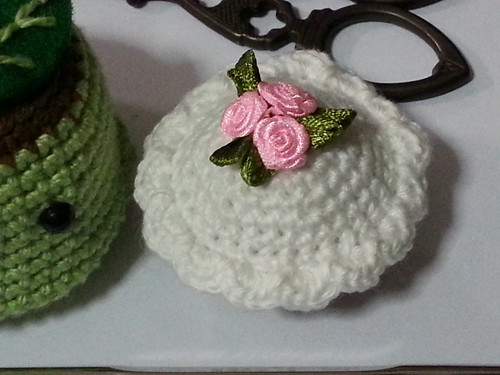
"Fairy Garden Teapot"


I torn out parts of the front of the box to make into a "cave-like" opening. Painted the box brown, added some darker brown paint, some texture paste, glass bead gel at torn edges.

Never did I plan to convert the box into a teapot. Its only while I was thinking how to hide the battery box of the "water-like" lights that the teapot idea dawned on me. Yup.. there's lights.


I adhere Prima paper behind and added a few painted chipboard leaves. For the base, I adhere assorted Woodlands Scenic fine turf, pebbles with Scenic Cement glue, added some diecut leaves, some plastic leaves. I also glue down 2 felted mushrooms that I made months ago.

For the handles, I drawn and cut down several pieces from chipboards and layered them. Then I added diecut swirls (Sizzix die) unto the handle before I go over with gesso and brown paint.

For the teapot sprout, I use a toilet roll core, added Prima paper inside. After that I snip twice on one side, glued together (to make one end smaller). Then I cover the core with gauze and thick layers of gesso (thus making my own "plaster") before paint it brown. Added another piece of cardstock inside the core at the bigger opening and snip out flaps. 


Then I adhered the sprout to the box.


I diecut this piece out and wrap around the sprout to cover the white flaps.


For the handle, I glue down the 2 flaps at the end before screwing it in.
Here's the finished result with vines and leaves added.


For the sprout, I also added in a lid made out of diecut round chipboard and tiny hinges and screws. And I hide the battery box inside. This sprout covered the original small opening for the rope handles (which I discarded). So its through this small opening that I inserted the wires connecting the battery box and the lights. When I want to switch on the lights, I just pull out the battery box and switch it on.


I twine vines and added plastic plants unto the handle too.


To decorate the garden, I added Dusty Attic chipboard branches and twine around with vines. Love how it blend together.


Also added Imaginarium Designs chipboard frame, gear and phrase chipboards as the title. Added Viva deco Inka Gold - Silver to the gear and frame. And painted the phrase chipboard black before add black glitter paint. Added a broken piece of the Dusty Attic branch chipboard to the bottom.


I adore this polymer clay doll. Bought it from this etsy shop, Fantasia Creations. Love her dolls!!! Have bought a few more. yeh... more projects to do. The bird nest is bought in a Johore Bahru wedding accessories shop. I'm so going back to get more now.


Here you can see the 2 felted mushrooms that I made. Its been some time since I felted anything. Maybe I should take them out to do again. Fun!!


I hope you enjoy my project and a little tutorial on how to do the handle and sprout. Hope you are inspired to make one yourself. Its not difficult at all. And through this project, I learned creative way to hide the battery box. Thankful!! :)

Well, thanks for dropping by. And do come by often. Merry Christmas and Blessed New Year!

Friday, December 19, 2014

Miniature Garden

Hi, all. Today I want to share about a project that I made few months back. Inspired by a miniature garden I saw at Pinterest, I decided to make my own.

"Miniature Garden"


Painted all 3 wood panels black. One wall pasted with Prima paper. For the other wall I applied texture paste at one side, use toothpick to "draw" out the bricks, heat dry, add some mists. Made the vines from scratch with Sizzix dies and cardstock and distress ink.

For the floor, I do the same as the brick wall for the stone pavement. Then the grass patch, I added some tiny stones and Woodland Scenics' assortment of turf and foliages and seal them with sprayed Scenic Cement glue. Then I added some ready made plastic plants.


For the two Dusty Attic chipboards (fence and the gate), I colored them with Viva Decor Inka Gold. Made the clay white frame with MS clay and etsy bought mold. Made the table and chair from scratch with wood sheets and strips and wooden legs and toothpicks. Then distressed the edges abit with distress inks.


Added the Prima resin fireplace, cornice, wood clock and some dollhouse accessories. Its a super fun project. I want to make more dollhouses!!!!

I hope you enjoy my project. Thanks for dropping by.

Tuesday, December 16, 2014

Exciting news!!!

Hi, friends. I'm super excited and feeling so so blessed!!!! Finally I can share this good news!! I'm so honored to be selected to be part of Imaginarium Designs' Design Team for 2015. Woo hoo..... :)

I love Imaginarium Designs chipboards!! I first got to know about chipboards when I won a pack of their chipboards from Once Upon A Sketch challenge years ago. From then on, I felt deeply in love with chipboards. And its my dream to be part of Imaginarium Designs DT. So now I'm very thankful that I got this chance.

If you would like a chance to win a bundle of Imaginarium Designs' chipboards, do hop over to this blog post and leave a comment. Have fun.

Thanks for dropping by and sharing in my joy.

Wednesday, December 10, 2014

Off The Rails Scrapbooking - DIY Planner

Hi, friends. Today at Off The Rails Scrapbooking, I will be sharing about the latest scrapbook trend: Planner. I'm sure some of you have noticed several scrapbook companies coming up with their own planners, inserts, stickers and notecards etc.

So I would like to share some of the planner inserts, stickers, labels, notecards etc that I DIY myself. Here's some pictures. For more details, please drop by Off The Rails Scrapbooking to read about it.


Do join us for our monthly challenge too. Hope you enjoy my sharing.
Have fun creating.

Thanks for dropping by.

Monday, December 1, 2014

Off The Rails Scrapbooking Challenge - Dec mood boards

Hi, friends. Its time again for another challenge for December at Off The Rails Scrapbooking. This month we have 2 mood boards for you to chose. Wow... amazing, right. And here are the 2 mood boards.


Lovely colors!!! So naturally I chose the non-traditional colors. :)

Here's my project:

"Do you want to build a snowman?" Canvas


I made this canvas piece to display at the craft table for my girl's 9th Birthday Party on 30 Nov. Her theme for the party is Frozen. 

Misted the background with Prima Color Bloom spray (Teal) and Shimmerz Vibez (Jeni B Bleu) over Tattered Angels snowflakes stencils. Then spread a thick layer of  Aleene's Snow Glitter over top and bottom of canvas to create the icicles and snow effects. Then I simply added strips of purple patterned papers, diecut snowflakes and snowman cut out and flowers. I used different chipboard alphas for the title. Recently I fell in love with sequins. So I added a variety of colored sequins over the whole canvas. Loved it. And yes, my girl love it. So are the kids who came to the party. 

I hope you enjoy my project. Do hop over to Off The Rails Scrapbooking to join in this month's challenge. Have fun.

Thanks for dropping by.


Saturday, November 29, 2014

Ten Chipboard Projects

Hi, all. Its been a few years since I shared about my ten favourite chipboard projects. I have always adore chipboards. So here's my current favorite and the way I uses them.

1) "Follow Your Bliss" Layout

Painted the chipboards  with Mix'd Media Inx and added glitter to some parts.


2) "Time Flies When You Are having Fun" Layout

Using Mix'd Media Inx, I colored the chipboard title.


3) "Our Little Boy" Layout

I inked the chipboard title and painted randomly with Shimmerz Paints Texturez Patina.


4) "Treasure Box" Altered Art

Though I made this piece afew years back, I still love it very much. The chipboards are simply painted with texture paste.


5) "Discover" Easel Frame

Added texture paste, paints and white chalk over the diecut chipboard frame. I use the same technique on the chipboard window. Randomly painted the chipboard clocks and gears with metallic paint. For the chipboard word, Discover, I painted with black acrylic paint and added Folkart black glitter paint too.Then inked abit with white chalk ink.


6) "Garden" Dollhouse

Painted the gate chipboard with Viva Deco Inka Gold-Silver and the fence chipboard with Viva Deco Inka Gold-Copper. Love using chipboards in making miniature dollhouses. First time sharing about this miniature garden though I made this in July. Will do up a more detailed post on this project.


7) "Secret Faerie Garden" Canvas and Altered Spoon

I colored the swirls chipboard with Viva Deco Inka Gold. For the chipboard on the spoon I do the same and also added abit of Shimmerz Paintz Texturez Patina.


8) "Paris Altered Matchbox"

This project is not my original creation. I saw a pretty altered matchbox in Pinterest and decided to try replicate it. Inked the chipboard frame with Viva Deco Inka Gold and "distressed" it with Twinkling H2O's teal zircon. For the circled chipboard behind, I painted it with Shimmerz Paintz Pearlz.


9) "Our wedding Day" Mini Album

Made this mini album for my cousin who's getting married. Its a simple photo album. I inked the chipboard title with Mix'd Media Inx and added glitter.


10) "Fairy Garden" Teapot

This piece is by far my most favorite and most recent project. I adore miniature dollhouse. Altered this piece from a box with rusty hinges. I painted the vines chipboards with acrylic paints and adhered one to the background in the box. For the chipboard vines on the outside, I twine around it with wired vines and adhered it. Love how it seems to merge together. I diecut layers of chipboard swirls and added to the chipboard handle (that i diy from scratch) before paint over. Will also do a more detailed blog post on this.


So here we are. All 10 projects that uses chipboards. I hope you enjoy my sharing and have fun crafting.

Thanks for dropping by.

Tuesday, November 11, 2014

"Nutcracker House" - Off The Rails Scrapbooking Project

Hi, friends. Today I want to share a project that I done for Off The Rails Scrapbooking DT assignment. I love and adore dollhouses and miniatures. So this month I decided to combine my love of it with scrapbook papers and supplies. 

Using graphic 45 "Nutcracker Sweet" collection, I altered a Daiso wood box into a house with door, window and a porch. Love the porch the most. :)

"Nutcracker House"

Here's some pictures of my project.


For more details, do hop over to Off The Rails Scrapbooking for a look and also join in the November Challenge. Have fun!

Thanks for dropping by.

Tuesday, October 21, 2014

Winners of 100th Follower Blog Candy

Hi hi. As promised, today I just draw out 2 winners for my 100th Follower Blog Candy. Congratulations to both of you. Please contact me via email (ctlove2scrap@gmail.com) with your address to claim your prize.


You are so generous to be offering this wonderful candy Carol. You'll reach the 100 follower mark in no time.
I would so love to have a chance. I've linked to my sidebar and I'm already a follower. Thanks for the chance
Hugs, Rosalee


Hey Carol, I`m your new follower. I do hope you reach your goal of 100 follower soon. Thanks for the chance.


Thanks for dropping by.

Wednesday, October 15, 2014

100th Follower Blog Candy

Hi hi. As promised, I will give out 2 packs of blog candies when I reached 100th followers. Thanks so much to all who followed my blog even though I was not that hardworking to blog often.... :P

To give more followers the chance to get the candies, you have till 20 Oct to drop a comment here. I will draw out 2 winners on 21 Oct. So quick hop over and leave a comment.


Thanks for dropping by.


Friday, October 10, 2014

"Reworking An Old Project" OTRS DT

Hi, today at Off The Rails Scrapbooking, I'm sharing a project I rework from past project. Reworking an old project can be fun yet nerve-wreaking at times. LOL.. simply because you don't know you will spoil the existing project or beautify it. But in the process of reworking, you learn something new. You learn how to perfect it!

Here I will just share the pictures of my project. For more details, please go here. And do join in our monthly challenge. This month's sponsor is Graphic 45. Wooo..... drool.... for the prize..

"Secret Faerie Garden" Canvas

Before: This 12 by 12 inches canvas is a sample for my brother's wedding guest book.


After: Created a secret garden for the faeries with Graphic 45 papers.


Isn't it fun to rework on old project and give it a new lease of life? Have a try. Now hop over to for more details and also join in our challenge.

Thanks for dropping by.

Tuesday, October 7, 2014

Off The Rails Scrapbooking October Challenge

Hi, friends. This month at Off The Rails Scrapbooking, we have another lovely mood palette.


These colors are so yummilicious. And the picture at top left just reminds me of ferris wheel!! So inspired by it, I created a art journal page on ferris wheel.

Note: I created this page outside of home when I waited for my kids' piano lessons to end. Brought along Faber Castell gelatos, wet tissue, 2 paper scraps, 1 small punch, pencil, black pen, white Sharpie pen and glossy accent.

"Enjoy The Ride"


Gesso the art journal page before add gelatos and rub over with wet tissue for background. Then I hand drew the ferris wheel with pencil and go over with black pen. I found some paper scraps with circular sunbursts, that are perfect for the cabins of the ferris wheel. It resembles the picture in the Oct Mood Palette. I cut them out and using a mini SU label punch, I punch out the "window" of the cabins.

After adhering all papers down, I use gelatos again over the whole ferris wheel. Added journaling. Lastly, I go over the ferris wheel with white Sharpie pen.

Its such a simple and fast page to create. As a busy stay home mum, I now try to opt for everything simple and fast. That way, I can continue crafting without having the stress or fear of neglecting my family. Yup... lately having this stress... life is stressful and i decided to simplify my life as well. But occasionally the mood strikes and I will still do more complicated projects. :)

Well, I hope you enjoy my simple project. Do hop over to Off The Rails Scrapbooking to join in this month's challenge. Our sponsor this month is Graphic 45. Yum yum prize!!

Thanks for dropping by. Have fun.  Do look out for my other project sharing on 10 Oct. 

Wednesday, September 10, 2014

"New Life" Canvas

Hi, friends. August is a super busy month for me. Had to rush and complete a few big orders for Teacher's Day gifts. So busy and tired that I miss my own crafting time!!! So glad its over and I can start to play!!

This month at Off The Rails Scrapbooking, we had a delicious mood palette challenge. Do hop over here and join us in the challenge.

For for DT assignment this month, I created a small mixed media canvas.

"New Life" Canvas

"New Life" canvas

I used our Sep Mood Palette as inspiration. Wanted to create something with a meaning of "out of the old comes new life". Hence the window and background depicts the old and the flower vines, birds and bird nest and eggs depict new life.

For more details, do hop over to Off The Rails Scrapbooking.

Thanks for visiting.

Tuesday, August 19, 2014

"S'pore - Gnome Sweet Gnome" Layout

Hi, friends. How about some mid-month inspiration at Off The Rails Scrapbooking? This month's mood palette and sketch is quite fun!!


And here's my take on it:


Spore LO

August 9 is Singapore's National Day. This photo was taken years back where we first brought our kids to celebrate Singapore's birthday at Esplanade. It was taken at our block's void deck before we drive off. Look how happy my girl was. She's such a sweet little girl. Always love her smile.

To create the background, I take the que from my girl's t-shirt. Hand cut banners, used texture paste over stencil to create swirls, stamped with some vintage shabby swirls stamps and misted it. I used Lawn Fawn stamps from the "Gnome Sweet Gnome" collection. They are so so cute!! And oh, this month's sponsor for our challenge is none other than Lawn Fawn. So do join us to win a set of stamps of your choice.

Spore LO

I stamped the journaling on white cardstock,cut and inked them. Loved the tiny mushroom images. So so cute!!!! I had fun coloring the images with Inktense Watercolor pencils.

Spore LO

Used Simple Stories calender bingo card cut-out and circled the number 9 for the date. To make the photo abit grungy, I randomly spread some texture paste around the edges with my palette knife.

Spore LO

Here you can see the texture paste swirls in the background.

Spore LO

I hope you enjoy my project. Do hop over to Off The Rails Scrapbooking to join in the challenge. Have fun.

Thanks for dropping by.

Thursday, August 14, 2014

Kitty Amigurumi and Instagram Bag

Hi, I'm here again to share about my crochet projects!! Using the pattern from the book, Zoomigurumi 1, I crochet a pink kitty for my dear friend, Karen. She loves cats!! And her cats are gorgeous and extremely shy!! I hope she loves this kitty I made for her.

Kitty Amigurumi

The shoes, dress and head band can be taken out. I especially love the shoes. They are so cute!!!

Kitty Amigurumi

Here's the side view. Aren't the shoes adorable!!!!

"Good Friends"

Here they are: 3 good friends together. Me (Giraffe), Fox (Aiyen) and Kitty (Karen) together!!!!Before I gave them out. I got 2 more amigurumis to crochet for 2 other owl friends!!!! Fun!!!

And here's another project I made. Its inspired by my crochet teacher, Wai Sam Ho. She made the gorgeous instagram bag and I copy the idea to make one for myself. Love them though its abit too small... But good enough size to put my HP portable charger. I used the clasp handle from Daiso. But atlas... now I can't find it anymore. :(

Instagram Bag Crochet

Btw, if you are interested in this instagram crochet bag, you can hop over to my teacher's website to purchase one. (fyi: I'm not earning any commission etc by recommending her... I just like her stuff and wish to share with you all). Here's her website: http://happie-scrappie.blogspot.sg/.

I hope you all enjoy my projects today. Have fun creating!!

Thanks for dropping by.

Sunday, August 10, 2014

Lawn Fawn "Critters" Drama Box!

Hi, friends. Happy National Day to all Singaporeans!! We just celebrated Singapore's 49th birthday yesterday. So yap.. still in the "National Day Mood"!!! :P

Today at Off The Rails Scrapbooking, I will be sharing a simple and fun tutorial on making a travel story-telling kit for kids using Lawn Fawn stamps and acrylic sheets. Please do hop on over to have a look at the tutorial and also join in our once a month challenge!! This month's sponsor is of course, Lawn Fawn. So do join in our Mood Palette with Sketch challenge and win yourself a Lawn Fawn stamp set.

Here's some pictures of my project. Do go here for the full tutorial.


"Travel Story-telling" Kit

"Travel Story-telling" Kit

Have a nice week ahead. Thanks for visiting!

Friday, August 1, 2014

Meet Kelly from Lawn Fawn

Hi everyone.. I got something very exciting to share!!! On 9 August, 11am EST, Kelly Marie Alvarez, owner of Lawn Fawn will be dropping by Off The Rails Scrapbooking Facebook group for a chat. And you stand a chance to win a giveaway too!!! Woo.... can't wait!!!!

But wait.... here's what you need to do!!

COMING SOON!!!


All chat will be at the Facebook site HERE
To be in the running for a giveaway before Saturday.
1. Share this post on your blog
2. Share this on Facebook or Instagram (if you have an account)
3. Like Lawn Fawn and Off the Rails facebook page
4. Leave a comment here to be running to win a little giveaway
Closes midnight EST  Friday 8th August 2014
winner announced at the live chat.

Excited?? Well, I am!!! So look forward to it!! Hope to see you there.

Thanks for dropping by.

Friday, July 25, 2014

More Amigurumis!!

Hi hi... Today I want to share some cuties with you all. Remember my crochet craze?? I discovered a crochet web, Amigurumi Patterns and bought 4 adorable amigurumi pattern books. After I got these books, I couldn't stop crocheting for a month!!! And made some for my friends. Am still doing now.

So here's what I have made:

Jean The Fox
Fox Amigurumi

Isn't it adorable!!! I love it so much!! But this is a gift for my friend who loves fox!!

Fox Amigurumi

Well, don't the white fur at the chest looks like a bib? :P

Fox Amigurumi

Look at the tail!! Cute?? I had a "hard" time stitching the tail to the body. But the effort is worth it. hmm.... abit unbearable to give out but then I told myself ... I will make another one for myself!! Hopefully it will motivate me to crochet more. LOL...

Fox Amigurumi

A photo of "me" & my "friend". hee..

Fox Amigurumi

You can see that I created a "Amigurumi Corner" at one of my Expedit shelf cube. Going to share more goodies and tempt you all to start crocheting.. :P

Thats all for today. Thanks for dropping by.

Monday, July 21, 2014

Blue Fern Studio Sketch Challenge

This month I join in the sketch challenge by Blue Fern Studios. I love their products!! Thanks to Jelissa Mei, I managed to buy their products! So so excited to use them!! I love their papers and chipboards!! Simply lovely and intricate.

Here's the July's sketch:


I flip the sketch and here's my layout that I made for my girl. 

"Sweet Love" Layout

"Sweet Love" Layout

I distressed all the paper edges and ink them with distress inks. Stamped on background and added texture paste over stencils. Rub some Pan Pastel chalks unto the dried texture paste patterns, misted the background with Prima Color Bloom spray.

"Sweet Love" Layout

I inked the Blue Fern chipboards with Mix'd Media Inx and added glitter to the butterflies part. Lace is also added to some parts along with some stickers.

"Sweet Love" Layout

Love the smile of my girl. I hope she would pursue her dreams and follow her bliss. Love her much! Using cutouts from Blue Fern papers I formed the title "Sweet Love Follow Your Bliss Today".

"Sweet Love" Layout

And here's the side view of the main cluster. I simply layer with papers, flower stickers, lace, chipboard and Prima flowers.  I hope you enjoy today's project.

Thanks for dropping by. 

Friday, July 18, 2014

Green Tea Pudding and Cupcake Amigurumi!

Crocheting is a really fun and addictive hobby. When the yards and hook reach my hands, I couldn't bear to put it down. I can crochet and crochet and crochet and even bring to the toilet with me.. oops.. just kidding ....gosh.. maybe I should go to some kind of rehab!! LOL....

So here's the adorable food that I made.

Green Tea Pudding
Green Tea Pudding Amigurumi

I crochet this with a pattern from my crochet teacher, Waisam Ho. You can go over her blog and use her free patterns. Oh.. she had a shop selling her yards and scrappy stuff too.

My owl friend upon seeing my love for amigurumi, she went and tag me links of cute amigurumi patterns. And I made a tiny cupcake from one of the patterns. So so kawaii!!!!

Mini Cupcake and Green Tea Pudding

The body of the cupcake is made of 2 parts and stitched together.

Mini Cupcake and Green Tea Pudding

The flowers on top are glued on. I'm lazy to stitch them down. Plus they are so tiny to stitch. :P

My Amigurumis

Ok. Here you can see the many amigurumis that I made so far... lol... got mushroom, lemon, a purple owl... and the "Teapot Bunny". lol,.... This picture is the one that created the cute name "Teapot Bunny" by my boy. I was inside the bedroom doing my crafts when he ran in excitedly and exclaimed:" Mommy, why is the Teapot Bunny sitting on the owls?" I was super puzzled and curious!! What Teapot Bunny? What owls?? Then he pulled me out of the room and showed me. Gosh!! I couldn't stop laughing!!!  So this is how Pom Pom Purin got the name "Teapot Bunny". lol lol

OK. Thats all for today. Stay tune for more amigurumi adventures!!

Thanks for visiting my blog.

Saturday, July 12, 2014

Off The Rails Scrapbooking - Something New & Exciting

Something new is happening at Off The Rails Scrapbooking. And I'm so excited to share this news with you all. From July 2014 onwards, we are going to have one challenge a month instead of fortnightly. This will allow you more time to create. Indeed our creative juices sometimes take time to squeeze out. LOL...  But on and off our DT team will have projects featured during the whole month to inspire you. So be sure to go over often to check out the amazing projects.

And here's the challenge this month: A mood palette


Our sponsor this month is Rachael Funnell. She's one of our DT member too. 
http://awindowtoomyworld.blogspot.com.au/

Inspired by the mood palette, I made a layout of my kids at the swimming pool. It's also my boy's first time in the pool.

"Time flies" LO

I used texture paste over a circles stencil to create a bubbles scene. Then I used my watercolors to go over the page to create the water effect. Pardon the white-washed effect of my photo. The actual LO is more blue than this. Then I used Simple Stories papers and stickers to to create the fun scene. Simply love Simple Stories papers!!! I also added sequins randomly across page.

IMG_0364"Time flies" LO

The title is a chipboard phrase from Imaginarium Designs. I adore chipboards!! For the top part, you can see some texture. Well, thats actually a mistake. LOL... I used a paste over it but end up not liking the effects. So I "cover" it with Donna Salazar's Mix'd Media Inx. You see.. its ok to make mistakes.. you can always rectify it and make something interesting.. :)

"Time flies" LO

I love this photo of my kids when they are younger. My son is still "fearless" of the water at that time. He even put his wet fingers in his mouth and he enjoys me carrying him like this. Now?? No more... lol... he's scared I will throw him in. lol lol...
"Time flies" LO

My hubby is usually the photographer of all our photos. So its not every time that I get to have him in the photos. And note that only my hubby is looking at the camera. lol...

Thats all for today's sharing. Do hop over to Off The Rails Scrapbooking to join in the month-long challenge. Have fun!

Thanks for visiting.