Monday, August 24, 2015

Imaginarium Designs August Projects

Hi, today I want to 2 projects that I had made for Imaginarium Designs. Do hop over to have a more detailed look and leave a comment to win some chipboards.

Here's some pictures of what I had done:

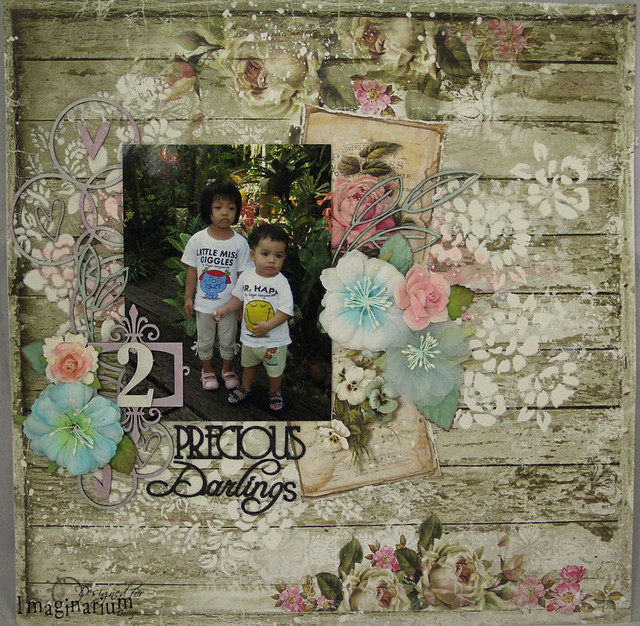
"2 Precious Darlings"

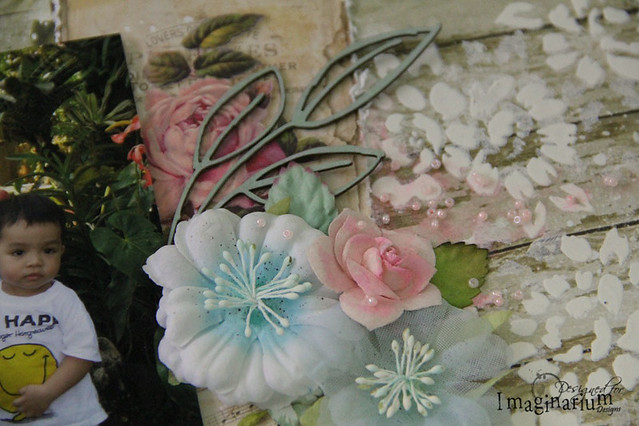
"2 Precious Darlings" Layout

Love this photo of my kids. Think its taken at Singapore Zoo. Love how adorable their expressions are. My boy was still holding on his bread.

"2 Precious Darlings" Layout

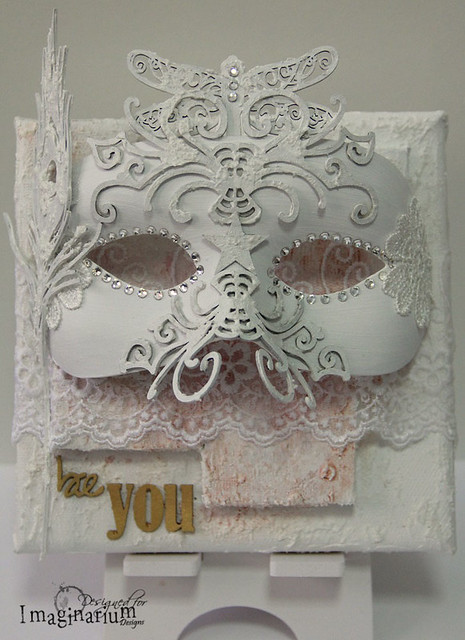
"Be You" Mask Canvas

"Be You" Mask Canvas

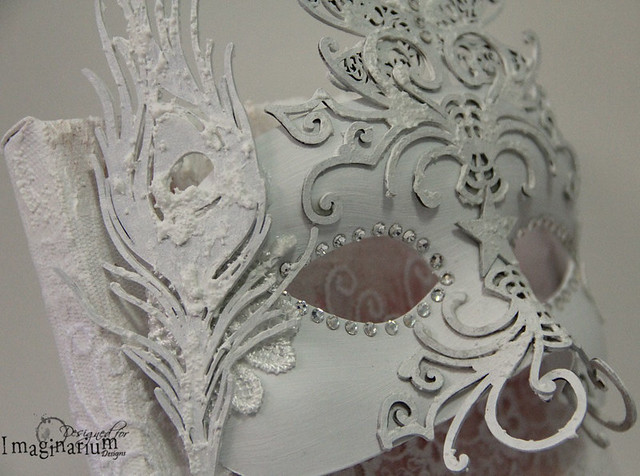
Made this mask canvas out of the idea that we humans always wear different masks at different situations. Sometimes we wear mask to hide our true feelings. Sometimes we wear mask to act brave and deal with difficult situation. Nonetheless these various masks make up who we are. I feel that they are still part of us. Over time, we thrown away some masks and gain some new ones. So let's not be ashamed of all the masks we wear. Accept them and find your true self. Be You.

"Be You" Mask Canvas

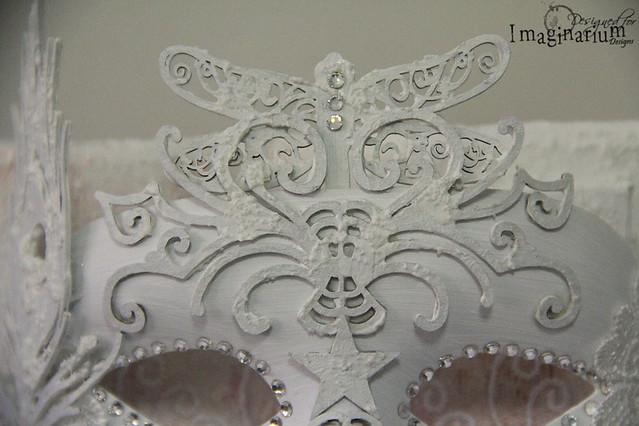
I use white for the whole mask for a purpose. Umm.... a rather silly purpose. LOL.. So that I won't freak out if I see it at night. I'm a rather timid girl who don't watch horror movies. LOL.

"Be You" Mask Canvas

I hope you like my projects. Do hop over to Imaginarium Designs to leave a comment to win some chipboards. Have fun.

Thanks for dropping by.

Friday, August 14, 2015

Part 3 - "The Repair Shop"

Hi, thanks for dropping by these few days. For those who are new to my blog, please go to Imaginarium Designs to see my project pictures. Today I want to share about the "soft" and small elements of the miniature shop.

Hanging on the side of the shop are 2 aprons. I diecut fabric with this Marianne Designs apron die. Didn't add in the pocket as its too feminine. I trim down the apron as its too long to fit in.

Added string and leather cords to the aprons and distress with distress ink to give them a dirty and oily look. The miniature metal hook on the wall is bought and nailed in.

"The Repair Shop"
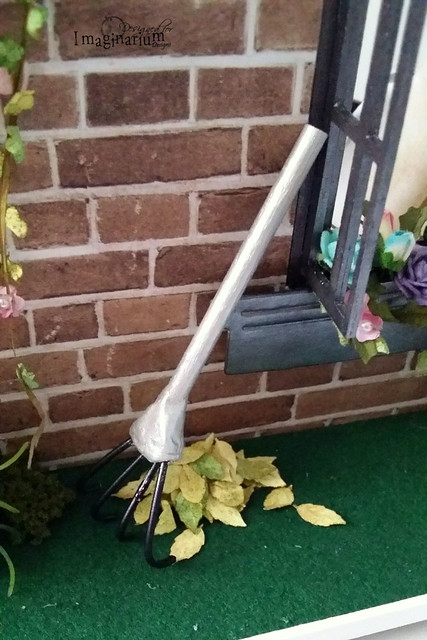
I made this rake from scratch too. Using a round wood strip and clay and some black wires. I experimented afew designs and finally decided on using this. Again I used Viva Decor Inka Gold-Silver for the handle of the rake.

 Ok. These are ugly rakes.


For the pile of leaves, I punched out the leaves then distress them w distress inks, twist and fold abit with tweezer. Then one by one I added beacon glue and adhere into a pile unto the felt grass patch.

"The Repair Shop"
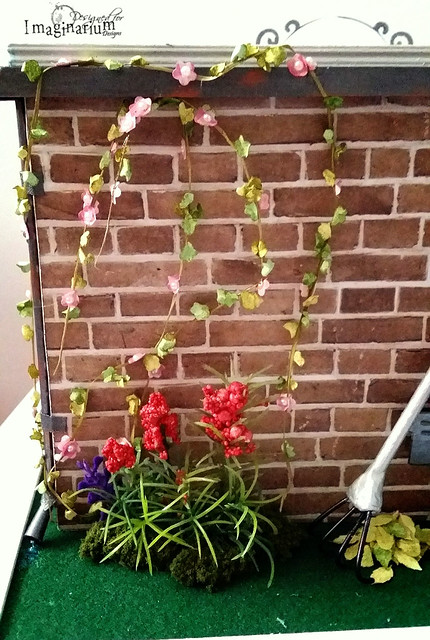
I made the flower vines from scratch too.

For the flower vines on the wall, I pulled thin strips of this raffia( bought from Artfriend) and use this as the vine.

With this Sizzix die, I diecut out many tiny flowers with pink paper and leaves with green paper. Both flower and leaf are done using this same die.

For the flowers, I adhered tiny half pearls in the middle. For the leaves, I crumbled them piece by piece and distress with distress inks.

After dripping glossy accent along the raffia, I used the raffia to pick up the flowers and leaves. Hence the vines become very natural looking. After letting the glossy accent dry overnight, I adhered the vine to the wall.

"The Repair Shop"


"The Repair Shop"
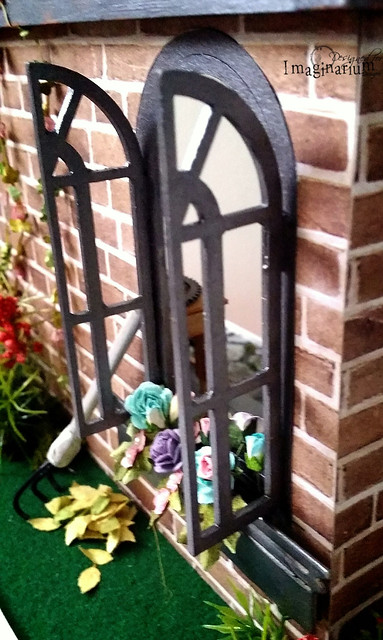
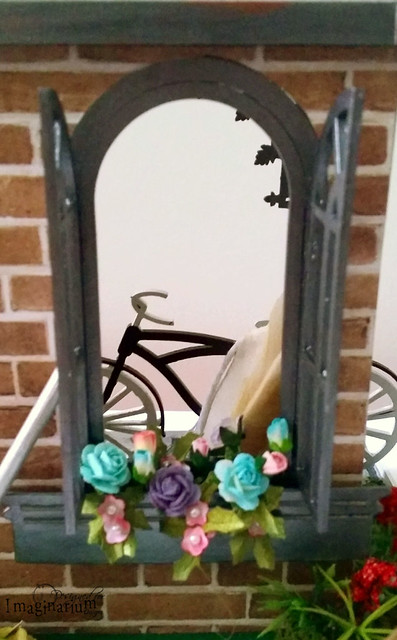
I also used the same pink flowers and some diecut leaves (distress with distress inks too and crumbled with tweezers) in the flower box. The flower box is made using Sizzix/Tim Holtz Window die (only use the flower box part) then pop up with foam strips.

I added some bought flowers and moss on the ground to create a more complete garden look.

Here's the picture of the finished product again:

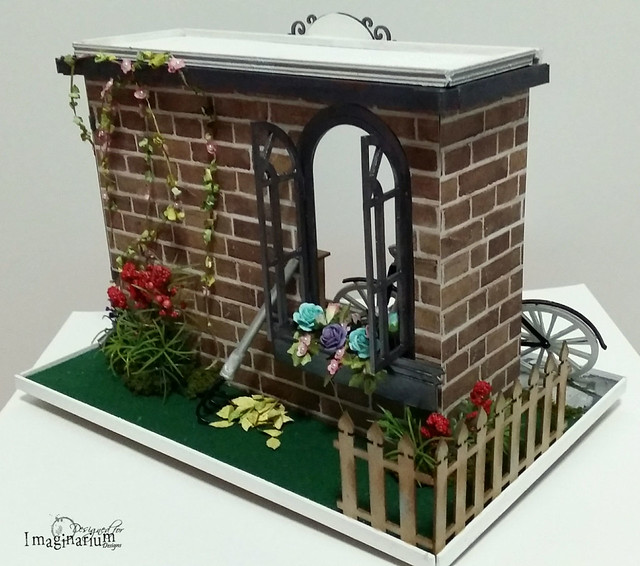
"The Repair Shop" Front of Shop

"The Repair Shop"
Back of shop

Hope you have enjoyed my 3 days of sharing for this project. Do try out some of the techniques I shared. Have fun.

Do hop over to Imaginarium Designs to see what my fellow team mates have created and leave a comment to win a pack of chipboards.

Thanks for visiting.

Thursday, August 13, 2015

Part 2 - "The Repair Shop"

Hi, this is part 2 of my sharing on my miniature repair shop. Today I want to share how I do the tool boxes and some of the small details of the shop.


Pardon the mess on my table. >.< There's 2 boxes under the table for this shop. One is a tool box and the other a crate. Both are made from kraft paper and a thin cardboard. Here's the 2 templates before assemble:

For this tool box, I inserted and adhered a toothpick into the 2 holes I poke on the tall sides of box.


Here's the back of the shop:

"The Repair Shop"

"The Repair Shop"
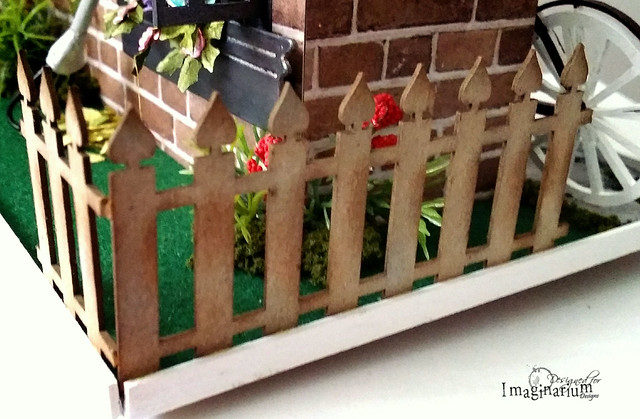
For the chipboard spade top picket fence, I left it raw and only rub some distress ink over to dirty it. For the wooden base, I cut and painted strips of wood over the edge to have a finished look and also to support the fence.

For the top of the shop, I added strips of painted white decorative wood strips to give a finished look too.

"The Repair Shop"

"The Repair Shop"
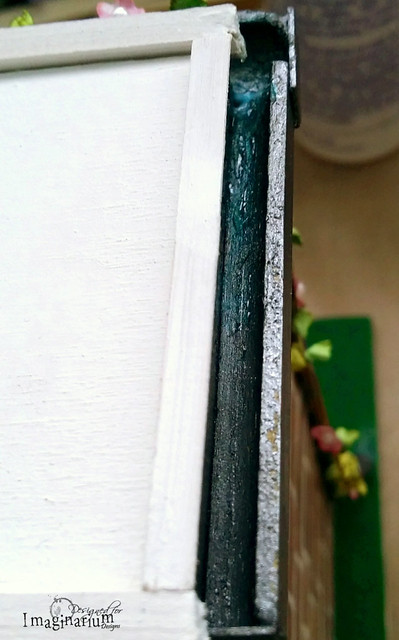
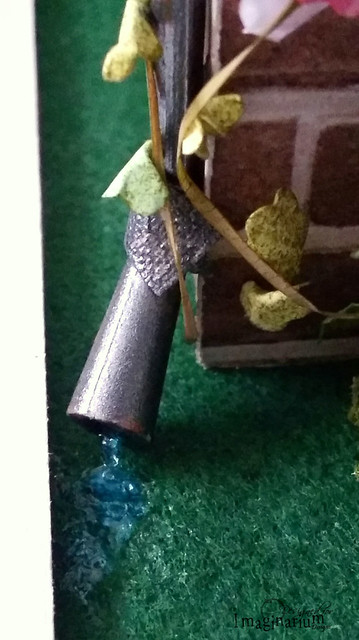
Under the decorative lining, I added a gutter and a pipe with "real" water. The gutter is made with strips of wood and paper strips and colored with Viva Decor Inka Gold-Graphite. For the pipe, I used a round wood strip and a small part that I break out from a stick (not sure its for tying balloon or lolly pop).


This is the part (circled) that I break out and used for the bottom of pipe. I colored it with Viva Decor Inka Gold-Graphite then glued and covered the joining part with a fabric tape(also colored with the Viva Decor Inka Gold). Then I squeezed out some Woodlands Scenic Water Effects into the gutter and the end of the pipe and unto the felt floor. The Water Effects dry transparent. So I painted over with blue Shimmerz Paint Spritz to make it more realistic.

That's all for today's sharing. Tomorrow I will share on making the vines, flowers, pile of leaves, rake and aprons (in the shop).

Do hop over to Imaginarium Designs and leave a comment to win a pack of chipboards and have a look at more complete pictures of my project.

Thanks for dropping by.

Wednesday, August 12, 2015

Imaginarium Designs - Off The Page Project

Hi, today I want to share a Off The Page project that I made for Imaginarium Designs. Due to the many tutorials and details of this project, I will be splitting and sharing afew posts on this project over the next few days.

"The Repair Shop"
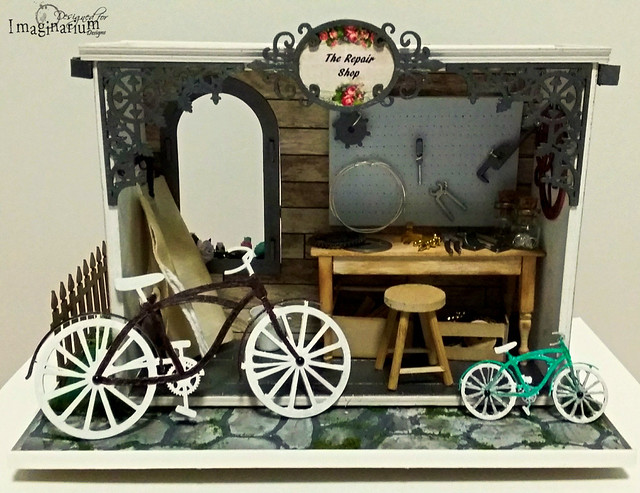
"The Repair Shop"

Inspired greatly by the chipboard windows, bicycles and the gears, I made a miniature repair shop. Today I will share on how to make the base and main body of shop.

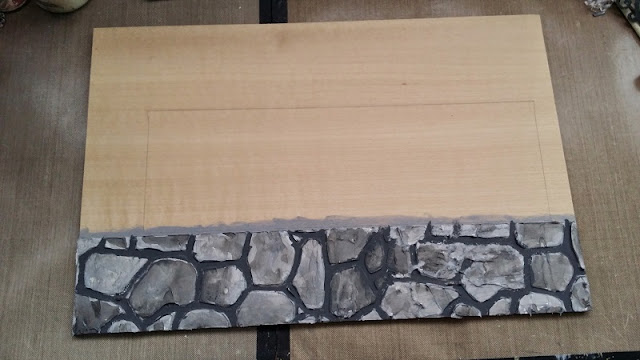
Used a wood board for the base. I mask off the rest of the area with masking tape. Then cover a portion of the board with texture paste over a stencil. Heat dry.

Paint over it with acrylic paint to create the stone pavement.

 Then I cover the rest of board with a green felt as grass patch.

Adhered some moss randomly.


I used a S$2 Daiso white wooden box (that's hollow base) for the main body of shop. Then I cut a piece of cardboard, cover with patterned paper and cut out the space for the chipboard windows and adhere to the box. After which I cover the sides with brick patterned papers.


For the floor in the shop, I scored strips of kraft papers, rub over with graphite Viva Decor Inka Gold, then arranged and adhered down to floor. Note that I added a thin strip of wood to widen the floor space abit (painted the wood strip white before adhere).


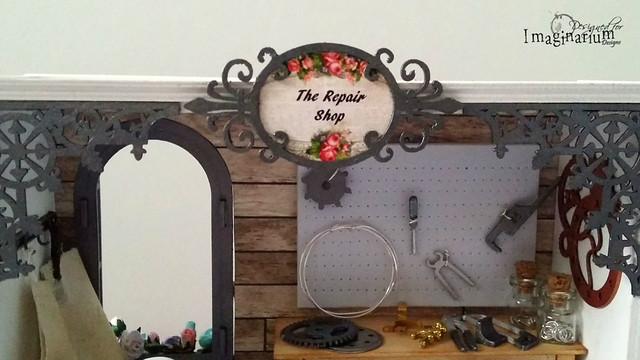
For the chipboard windows, gears, corners, frames and the diecut tools (glued about 7 layers of diecut kraft papers), I colored them with Viva Decor Inka Gold-Graphite, Silver and Bronze.

I made the table from wood sheet and strips and wooden decorative legs and inked randomly with distress ink to give it a dirty look. For the peg board, I cut from a foam sheet, used piercer to poke holes and twist wires around the tools to hang them on the peg board. And they can be removed easily. I made the kraft tool boxes (below the table) from scratch too.

Here's some pictures of the miniature shop:
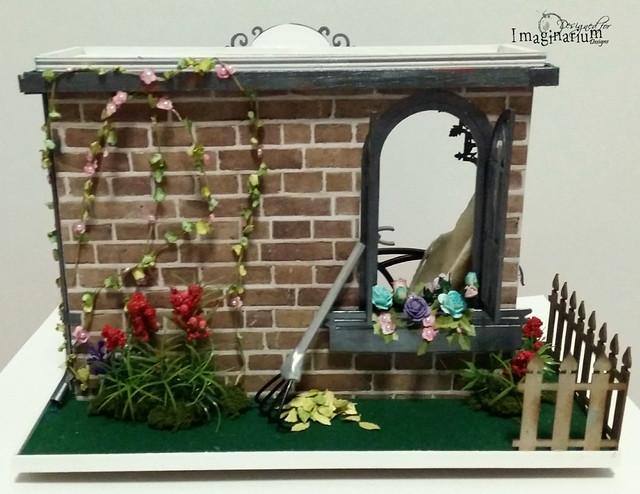
"The Repair Shop"

"The Repair Shop"

"The Repair Shop"
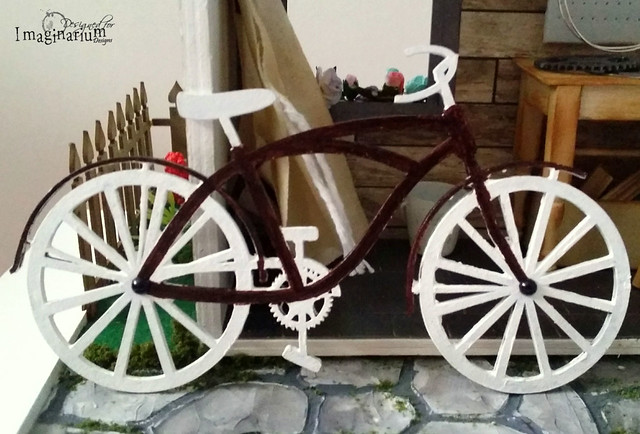
For the chipboard bicycles, I painted them white, then go over certain parts with Sharpie pens and added black half pearls at centre of wheel.

For more pictures of the whole shop, do hop over to Imaginarium Designs to have a look. I will be sharing more picture tutorials and details of this miniature shop in the next few days. Do stay tuned.

Here's the chipboards I used for the miniature shop:


(Used both big and small bicycles)


If you are interested to buy these yummy chipboards, do go over to Seriously Scrapbooking to get them.

Do hop over to Imaginarium Designs to look at more pictures of my project. And do leave a comment to win a pack of chipboards. Have fun. Thanks for dropping by.