Follow my blog with Bloglovin

Monday, November 18, 2013

Off The Rails Scrapbooking Challenge Blog
Hi, friends. Been busy busy.... And today I have something exciting to share.
I'm very honored and excited to be part of the Design Team of a new blog challenge, Off The Rails Scrapbooking. Do head over to have a look and spread the news.
The first challenge will be announced on 29th November. Do follow the blog and join in the fun. Woo... I can't wait for the challenge to start.
Have fun. And thanks for dropping by.
Monday, September 30, 2013
"Altered Book" NLB Project
Hi, friends. This past month had been a busy period for me. One order after another. One sickness after another. Grandma being hospitalised too for 2 weeks. But thank God she's ok and discharged now.
Today I want to share a past project. Its actually done last year. I attended a "Altered Book" workshop organised by National Library Board last year. After the workshop the instructor invited us to take part in this "Altered Book" project with several themes. I decided to join in the theme of "Home". Each participant is to altered a double page of hard cover gessoed story book and after done, to pass on to another participant. The finished books will be on exhibit in Bishan Library this year around June. Sorry I took so long to blog about this. :P
"Altered Book" - Heavenly Home...
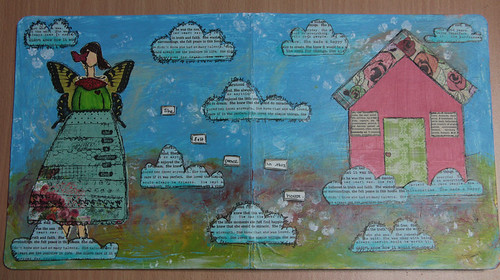
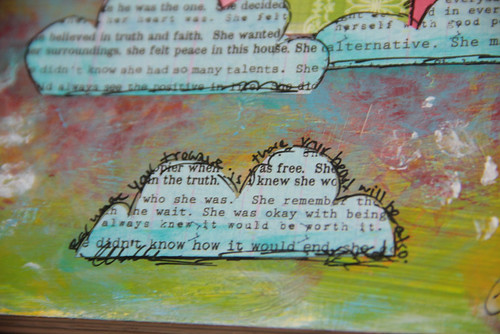
I made this page with regards to my belief, my heavenly home. I painted the background with acrylic paints, sponged/dabbed some white paint over stencil. Added the clouds, house, mixed media girl.
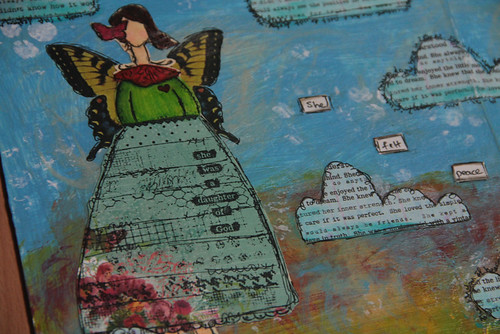
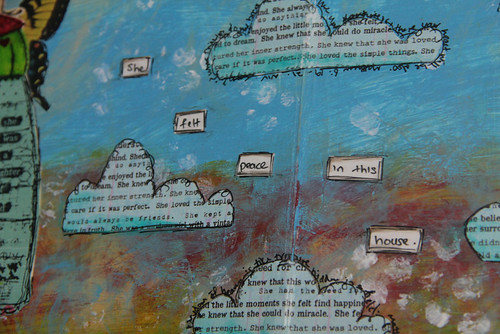
I used Faber Castell Big Brush Pens and gelatos for the girl and clouds. My journaling is done around the clouds.
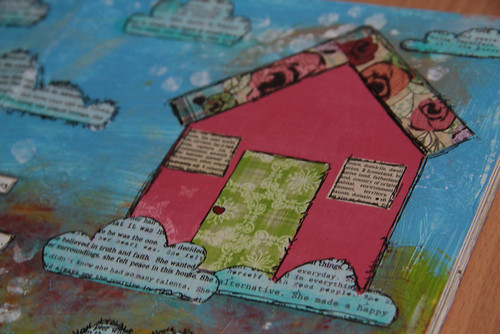
Below are some close-ups:
And here's the exhibit at Bishan Library.


I love mixed media. I love the no-rules part of it. Though I would love to do the messy kind of art, I find that I tend to be quite neat and not messy at all... hmmm.... I think I'm still not that "free" in my expression. Hmm.... or is that considered as my style? So I got to work on mixed media more and explore about myself through this art venture. I hope you will too..
Have fun. Thanks for visiting my blog.
Today I want to share a past project. Its actually done last year. I attended a "Altered Book" workshop organised by National Library Board last year. After the workshop the instructor invited us to take part in this "Altered Book" project with several themes. I decided to join in the theme of "Home". Each participant is to altered a double page of hard cover gessoed story book and after done, to pass on to another participant. The finished books will be on exhibit in Bishan Library this year around June. Sorry I took so long to blog about this. :P
"Altered Book" - Heavenly Home...
I made this page with regards to my belief, my heavenly home. I painted the background with acrylic paints, sponged/dabbed some white paint over stencil. Added the clouds, house, mixed media girl.
I used Faber Castell Big Brush Pens and gelatos for the girl and clouds. My journaling is done around the clouds.
Below are some close-ups:


I love mixed media. I love the no-rules part of it. Though I would love to do the messy kind of art, I find that I tend to be quite neat and not messy at all... hmmm.... I think I'm still not that "free" in my expression. Hmm.... or is that considered as my style? So I got to work on mixed media more and explore about myself through this art venture. I hope you will too..
Have fun. Thanks for visiting my blog.
Tuesday, September 10, 2013
Prima Inspired Album
Hello!!!! This week is school holiday in Singapore. So needless to say, I will be more busy than ever as my girl is at home the entire week and I need to think of programs for her. Well, good that my son is in childcare. Phew!! Ha ha...
Today I want to share another past project. Its a mini album inspired by Prima Design Team's video tutorial. Well, if you have been to Prima Marketing's blog and UStream, I'm sure this project won't be a surprise to you. It's basically like a replica!! But then I love the finished product though it's "copied".
"Flower Pot" Album
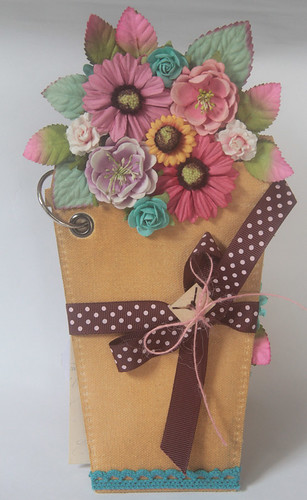
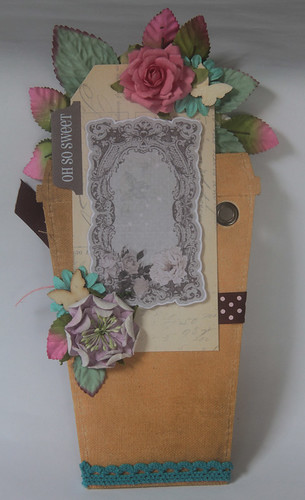
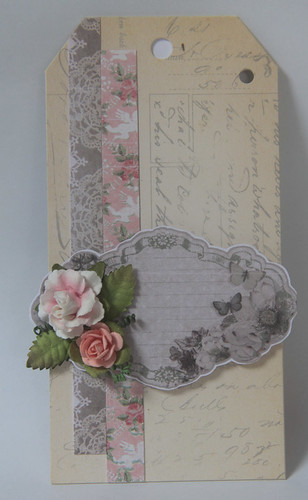
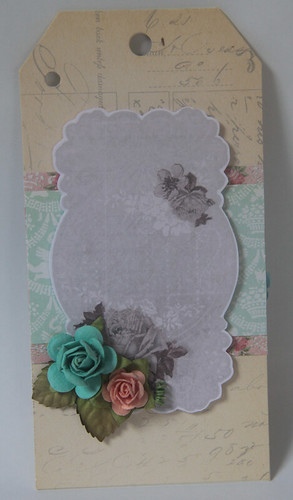
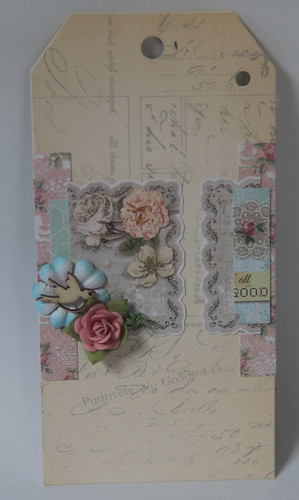
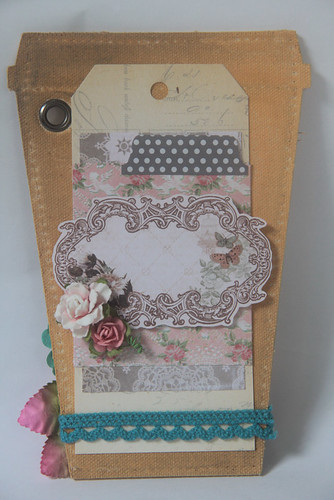
Following the same technique in Prima's blog, I used Faber Castell Gelatoes to color the canvas. Then I added the ribbon, embellishments, flowers. A tag was added behind the canvas cover so as to provide the backing for the flowers. I used Prima's doll tags for this. And the journal tags in this album are printables from Prima's Friday Freebies at their facebook page.
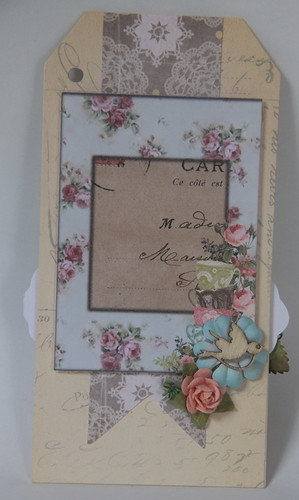
For the inserts, I used Prima's doll tags. In this page, I created my own digital journal tag with some of the digital files I bought, using Photoshop software. Digital images are a great money-saving and space-saving crafting supply. Here are the rest of the pages, done using digital images as well as Prima's papers.
And here's the back of the canvas album:
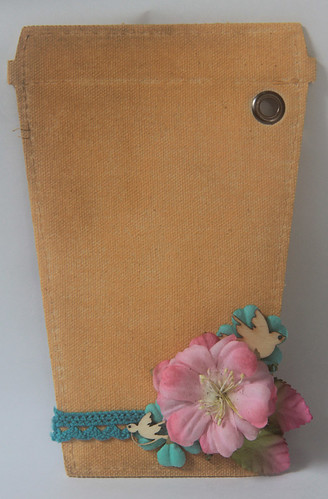
Its such a lovely and fun project. I hope you are encouraged to try. If you want to view the video tutorial, do drop by Prima's blog. Have fun!!
Thanks for visiting.
Today I want to share another past project. Its a mini album inspired by Prima Design Team's video tutorial. Well, if you have been to Prima Marketing's blog and UStream, I'm sure this project won't be a surprise to you. It's basically like a replica!! But then I love the finished product though it's "copied".
"Flower Pot" Album
Following the same technique in Prima's blog, I used Faber Castell Gelatoes to color the canvas. Then I added the ribbon, embellishments, flowers. A tag was added behind the canvas cover so as to provide the backing for the flowers. I used Prima's doll tags for this. And the journal tags in this album are printables from Prima's Friday Freebies at their facebook page.
For the inserts, I used Prima's doll tags. In this page, I created my own digital journal tag with some of the digital files I bought, using Photoshop software. Digital images are a great money-saving and space-saving crafting supply. Here are the rest of the pages, done using digital images as well as Prima's papers.
And here's the back of the canvas album:
Its such a lovely and fun project. I hope you are encouraged to try. If you want to view the video tutorial, do drop by Prima's blog. Have fun!!
Thanks for visiting.
Friday, September 6, 2013
"Poppies" Mixed Media Canvas
Hi friends. August is a busy busy month for me. Because the first Friday of September is Teacher's Day. So I had quite alot of orders the past month. So I haven't had the time to do my own crafting. And boy, I missed crafting. Its a different kind of feeling when you are crafting for orders and crafting for own pleasure. And I missed my mixed media fun!!!! Ironically, today I'm sharing a mixed media project I made few months back.
I actually take a finished canvas and altered it. I think I haven't share that original piece too. Well, I made a poppies canvas for a local scrapbooking challenge facebook group. After that, I kept looking at it and was not pleased with the look. So I went ahead and altered it again.
"Poppies" Canvas
This is the original piece. Ugly, right?
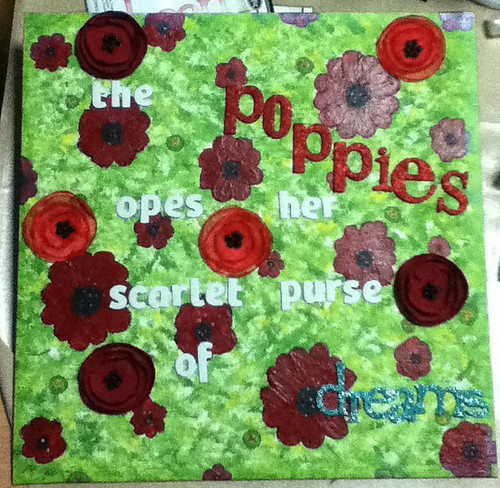
I'm not happy with this piece as I think its too busy!!! The poppies completely took the limelight from the phrase. And I don't like the orientation of the wordings too... Well, who made this? Me!! And when? In the middle of the night!!! Ha ha....
So I went and alter it to this:
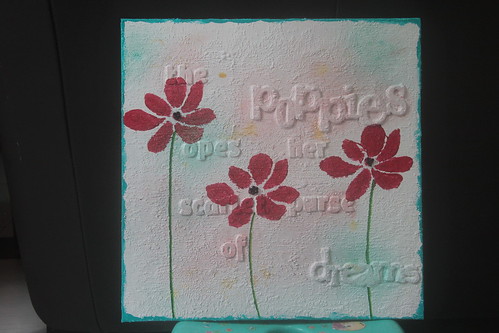
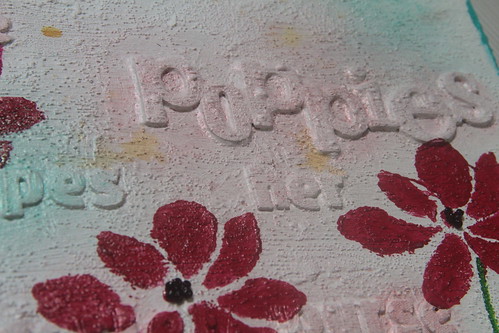
It's still not the perfect piece. Too much space..ha ha... But it will do for now. At least I love the poppies. I painted a mixture of white acrylic paint and glass bead gel over the whole canvas, misted it and added some turquoise paint around the edges. I stamped the poppies with Donna Downey foam stamp and added some black beads as the flower center. Hmmm....should I add the leaves and doodle some borders?? hmm......
Here's some close ups:
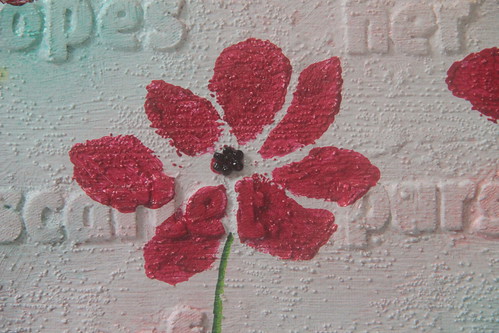
I hope you get inspired to alter any art piece that you are not happy with. Instead of throwing away, alter it! Till you are pleased!! Art is always evolving!! I got more past projects to share. Do keep a lookout.
Thanks for dropping by.
I actually take a finished canvas and altered it. I think I haven't share that original piece too. Well, I made a poppies canvas for a local scrapbooking challenge facebook group. After that, I kept looking at it and was not pleased with the look. So I went ahead and altered it again.
"Poppies" Canvas
This is the original piece. Ugly, right?
I'm not happy with this piece as I think its too busy!!! The poppies completely took the limelight from the phrase. And I don't like the orientation of the wordings too... Well, who made this? Me!! And when? In the middle of the night!!! Ha ha....
So I went and alter it to this:
It's still not the perfect piece. Too much space..ha ha... But it will do for now. At least I love the poppies. I painted a mixture of white acrylic paint and glass bead gel over the whole canvas, misted it and added some turquoise paint around the edges. I stamped the poppies with Donna Downey foam stamp and added some black beads as the flower center. Hmmm....should I add the leaves and doodle some borders?? hmm......
Here's some close ups:
I hope you get inspired to alter any art piece that you are not happy with. Instead of throwing away, alter it! Till you are pleased!! Art is always evolving!! I got more past projects to share. Do keep a lookout.
Thanks for dropping by.
Tuesday, September 3, 2013
Busy Busy
Hi everyone. Sorry for the long break in blogging. Been very very busy. With my art class. I started attending painting and sketching class. Its fun but kept me busy too. And surely this year is filled with sickness too. Been down with throat inflammation on and off the past few months. I just recovered from the last "attack". Doctor says its my allergy and sensitive nose that trigger my sinusitis and led to throat inflammation. Oh boy... I need to take more vegetables and fruits!!!! And pray hard that the haze from Indonesia forest fire won't come back again. A terrible haze!!! Triggered all my allergies and cause burning sensation in my nose!!!! Air pollution, please go away!!! Hee...
Enough ranting!! Today I want to share a project I made few months back. I love 3D projects. So I made 2 teapot sets, one for myself and one for my girl to play using Silhouette Cameo and SVG Cuts design.
"Vintage Teapot"
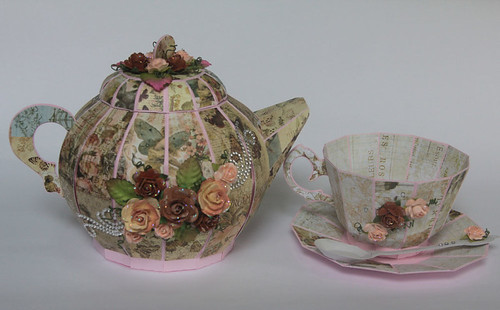
I used Pink Paislee paper collection for the teapot and cup. Love how vintage they are. Added Prima flowers and blings. This is such a pretty digital design file by SVG Cuts. Lovely, aren't they!!
Here's some close up:
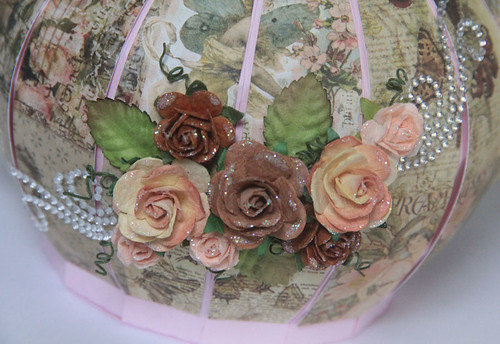
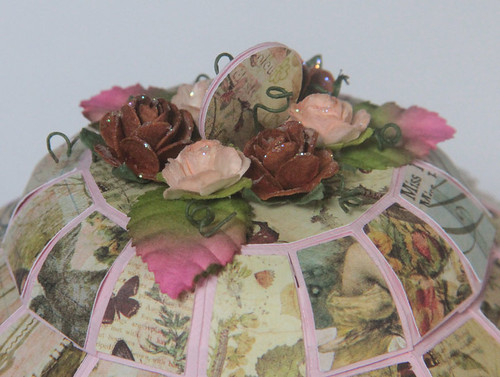
I added some glitter onto the flowers to sparkle them up. After seeing my finished project, my sweet girl requested to have a pink set for her. It took me some time to do another one for her. And I made a cupcake box for her as well. And I used her favourite fruit patterned paper, strawberry!!
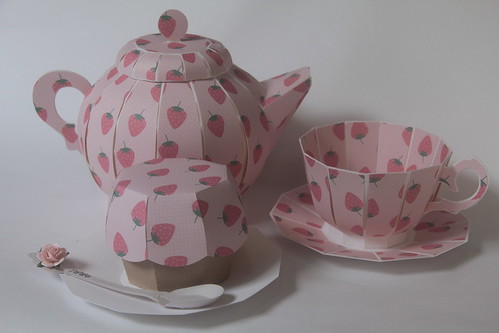
I didn't put any flowers or blings for her teapot set as I know she want it plain and functional so she can play together with her food toys. Well, after this, she requested for other food!!! Oh boy!!! ha ha.... I hope I can make a food stall for her soon. Just like what I saw at IKEA. I know I can simply buy the food stall but then its more fun to make one. Agree?? hee...
Well, thats it for today's post. I try to blog more often. Hope my followers will keep following me. hee... Do drop by and comment on my 5th blog candy post here to win some goodies.
Thanks for visiting.
Enough ranting!! Today I want to share a project I made few months back. I love 3D projects. So I made 2 teapot sets, one for myself and one for my girl to play using Silhouette Cameo and SVG Cuts design.
"Vintage Teapot"
I used Pink Paislee paper collection for the teapot and cup. Love how vintage they are. Added Prima flowers and blings. This is such a pretty digital design file by SVG Cuts. Lovely, aren't they!!
Here's some close up:
I added some glitter onto the flowers to sparkle them up. After seeing my finished project, my sweet girl requested to have a pink set for her. It took me some time to do another one for her. And I made a cupcake box for her as well. And I used her favourite fruit patterned paper, strawberry!!
I didn't put any flowers or blings for her teapot set as I know she want it plain and functional so she can play together with her food toys. Well, after this, she requested for other food!!! Oh boy!!! ha ha.... I hope I can make a food stall for her soon. Just like what I saw at IKEA. I know I can simply buy the food stall but then its more fun to make one. Agree?? hee...
Well, thats it for today's post. I try to blog more often. Hope my followers will keep following me. hee... Do drop by and comment on my 5th blog candy post here to win some goodies.
Thanks for visiting.
Wednesday, May 15, 2013
"Love With The Heart" Layout
Hi hi, everyone. Lately I have been pretty busy even though I have no more design team commitments. So I'm sorry that I have not been active much in blogging.
Today I want to share another wedding layout. I made this layout for a local interest group challenge. The challenge is to scraplift from a layout provided. Can be by colours or sketch layout etc.
Here's my take:
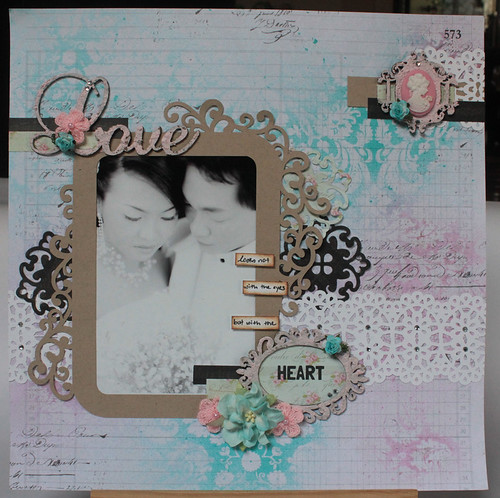
I scraplifted the sketch layout design. I wanted to create a simpler look with little bit of layering. I sprayed mists on Pink Paislee Mistables papers. Cut the kraft frame with Silhouette Cameo, punched the white lacey strip and diecut the doilies with Spellbinders die. I also used Dusty Attic chipboards and Want2Scrap chipboard.
I love this particular photo. Me and my hubby looking down at the baby's breath flowers!! And I love the quote, "Love looks not with the eyes but with the heart!". Its such a perfect quote for this photo!!!
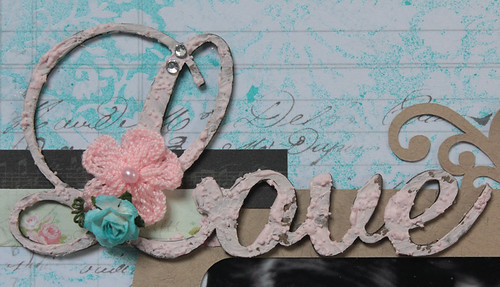
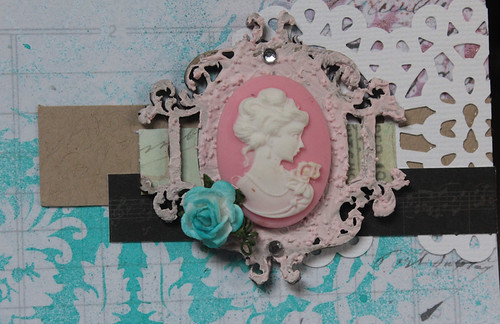

For the chipboards, I painted with a mixture of gesso, pink acrylic paint and glass bead gel.
Recent months, I started to join back the local ATC Swap group!! So I will be sharing about the ATCs that I have made so far. Do stay tune. And do join in my 5th Blog Candy here.
Thank you for visiting!! See you soon!!
Today I want to share another wedding layout. I made this layout for a local interest group challenge. The challenge is to scraplift from a layout provided. Can be by colours or sketch layout etc.
Here's my take:
I scraplifted the sketch layout design. I wanted to create a simpler look with little bit of layering. I sprayed mists on Pink Paislee Mistables papers. Cut the kraft frame with Silhouette Cameo, punched the white lacey strip and diecut the doilies with Spellbinders die. I also used Dusty Attic chipboards and Want2Scrap chipboard.
I love this particular photo. Me and my hubby looking down at the baby's breath flowers!! And I love the quote, "Love looks not with the eyes but with the heart!". Its such a perfect quote for this photo!!!
For the chipboards, I painted with a mixture of gesso, pink acrylic paint and glass bead gel.
Recent months, I started to join back the local ATC Swap group!! So I will be sharing about the ATCs that I have made so far. Do stay tune. And do join in my 5th Blog Candy here.
Thank you for visiting!! See you soon!!
Subscribe to:
Posts (Atom)